Trees are the giants of the plant world and many species of tree will outlive any human. So, planting a tree is a gift for future generations. Furthermore, since trees lock up substantial quantities of carbon, they help to combat climate change. For children, growing a tree of their own from scratch is great fun and will help them to value these wonderful plants and understand their life cycle.
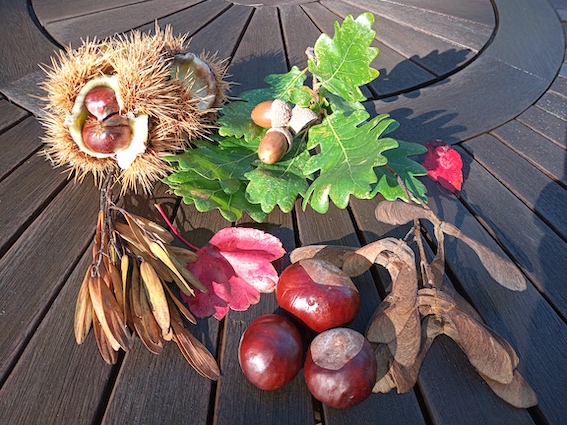
There are two basic ways to grow a tree from seed: outdoors and indoors. The outdoor method is a little simpler for most native British trees, but the indoor approach allows children to observe the germination and early growth more closely. With either approach, the best time to start is in the autumn, when you can mount an expedition to collect plenty of seeds: acorns, nuts of various sorts, winged seeds such as those from ash and sycamore trees, cones from conifers, and berries from trees such as rowan and holly. Not every seed will germinate, so it is worth collecting perhaps half a dozen each of the varieties you want to try.
Preparation
In the case of cones and berries the seeds will need to be extracted first. Ripe (i.e. woody) cones will open and release their seeds if they are placed in a paper bag and kept somewhere warm for a few days. Berries can be squashed or cut open and the flesh washed away from the seeds. Nuts will germinate more readily if they are soaked first. Drop them into a container of water, discard any which float (they are probably sterile) and leave the rest to soak for a day or so.
Germination - outdoor method
Many British trees require a period of cold before they will germinate. Try asking a child why they think this might be a good idea. (Hint: think what would happen to a young seedling if it started to grow straight away, in the autumn.) The easiest way to give the seeds the necessary cold treatment is to plant them outside. The winter should then do the trick. However, many seeds are eaten by rodents such as mice and squirrels, or by birds, so you will need to protect your seeds if you want them to escape. Plant several seeds of the same sort a couple of centimetres deep in a pot of compost, with drainage holes in the bottom, cover the pot with wire to keep animals and birds off, or place your pots in a larger container which you can cover. If you are trying several different species at once then be sure to label your pots so you know which is which. Then place the pots in a shady spot (the north side of your house is ideal) and keep an eye on them to ensure they do not dry out or become waterlogged. Then wait for early spring to see some seedlings emerge. This guide from the Woodland Trust gives a simple description of this method, and goes on to discuss what to do after your seeds have germinated.
Germination - indoor method
Germinating your seeds indoors avoids have to wait for spring, and allows children a closer look at the process of germination. The period of cold your seeds may need to break their dormancy can be provided by your fridge. Seal them inside a transparent plastic bag, along with some damp paper towel, pop them into the fridge (not the freezer!) and inspect them every week or two for signs of germination, which could take up two or three months. Once you see a root emerging from one of the seeds you can pot it up right away, place it on a windowsill and treat it like a house plant for a few months as it develops. An alternative which allows children to watch the development of roots and shoots in more detail is to start its growth in a jar, as described in our seed jar activity. Once the seedling has developed a few leaves you will need to plant it into a pot with potting compost so it can take up the nutrients it needs to grow. If you leave it too long then it may fail to survive the transfer,
Exotics
Not all tree seeds require cold treatment for germination. Those which grow in frost-free countries can be sown straight away indoors. Some of the best examples are citrus fruits. There is something especially intriguing for children in growing a tree from something they might eat, so an orange would be a good choice, but lemon, grapefruit or lime should work just as well. Soak the pips in water for a couple of hours before planting them 1-2 cm deep in potting compost. Fix a plastic bag over the top of the pot with a rubber band, keep it moist and place it somewhere warm (but not too close to a radiator). Pips which germinate will make good house plants, but children should not expect to be harvesting fruit from them! Advice on growing other plants from edible fruits can be found here. Apples and pears are other obvious choices, but will require cold treatment.
What next?

Your young trees can be grown on in pots outdoors (apart from exotics, which would not survive a British winter outdoors), and should be repotted as necessary if you want them to grow to full size. Once they reach a foot or so in height they can be planted out into the ground. You can do this at any time of year, but it will be very important to keep young trees well watered if you plant them out in summer. Bare root trees (the cheapest way to buy them if you are not growing them from seed) are usually planted in winter or early spring. If rabbits or deer are likely to visit, then you would be wise to protect your saplings with tree guards. Further advice is available from the Woodland Trust on planting and caring for young trees.
If you don't have room in your garden for a full grown tree then you might be able to find an opportunity to plant it out elsewhere. There may be local groups engaged in tree planting for the environment. There are also national programmes such as the National Forest and the Queen's Green Canopy. See what you can find with an internet search.
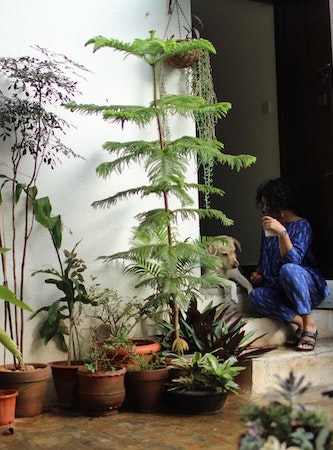
Alternatively, if the root development of trees is restricted by a pot of modest size then they will not grow to full height and can look very attractive against a wall or in a courtyard. You will need to keep them from completely drying out, so a fairly shady spot is best, and they will need watering in hot weather. If you are feeling artistic and are happy to spend regular time on it, you could even turn your tree into a bonsai. Many sites, such as this, have instructions.
Credits: thanks to John Rhymer from Wyre Forest u3a for ideas and help with this activity.